Hooks

- 함수 컴포넌트는 클래스 컴포넌트와는 달리 state 사용이랑 Lifecycle 사용이 불가능하다. 그래서 이를 보완하기 위해 Hooks을 이용한다.
- 갈고리라는 뜻, 마치 갈고리를 거는 것처럼 끼워서 사용하는 듯함
- 이름 앞에 use로 시작해야 함(약속)
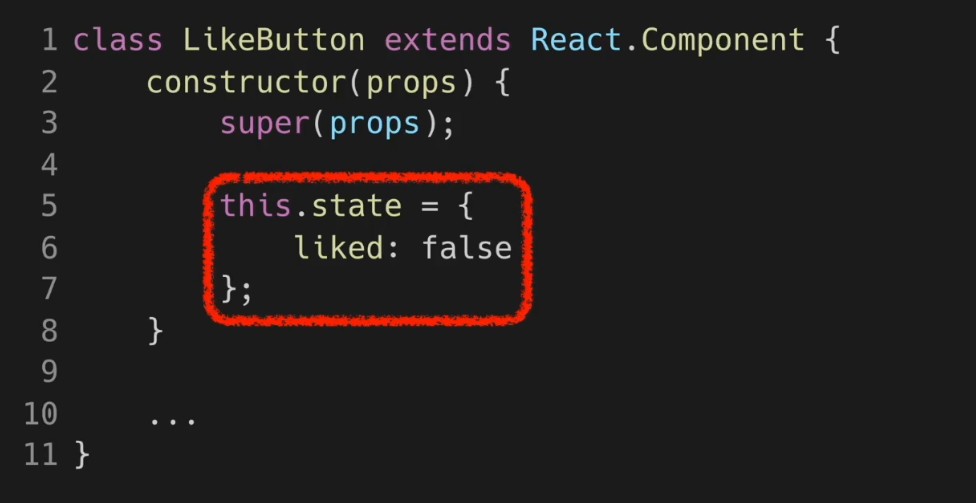
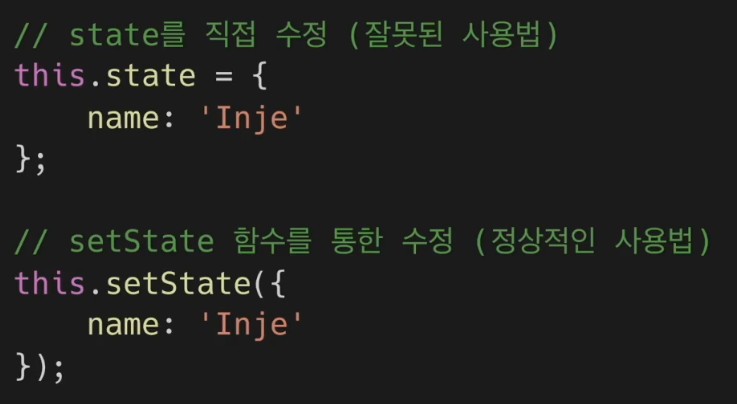
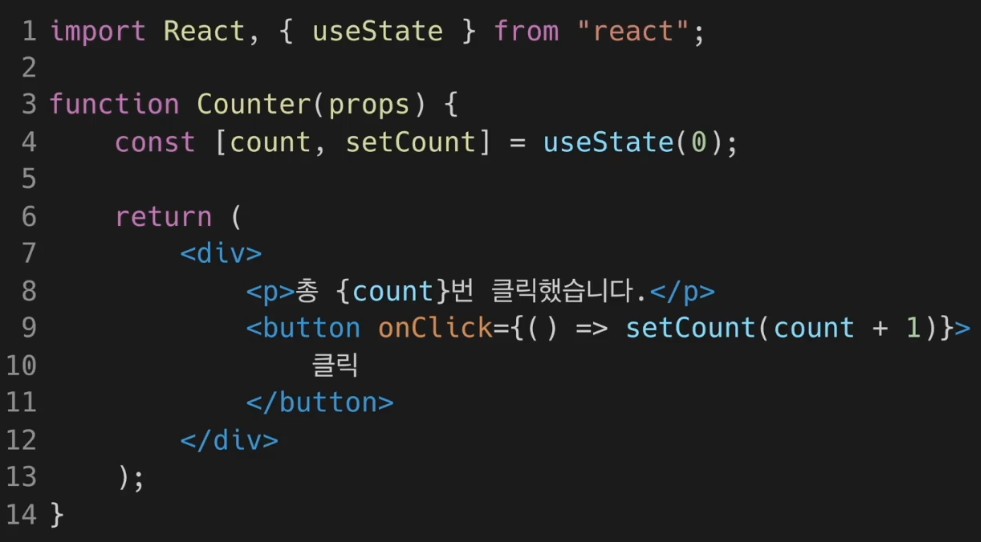
useState() : state를 사용하기 위한 Hook
- const [변수명, set함수명] = useState(초기값);
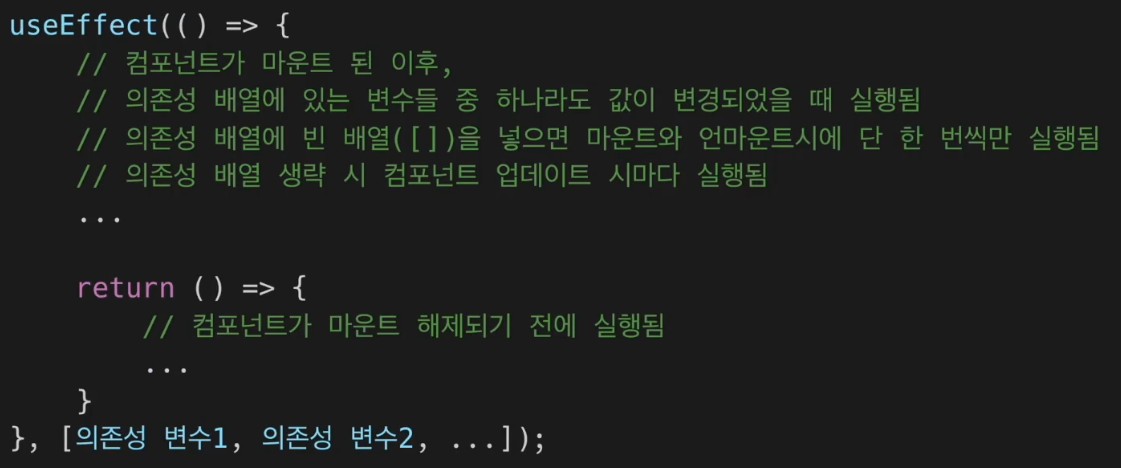
useEffect() : Side effect를 수행하기 위한 Hook
- Side effect = 효과, 영향
- useEffect(이펙트 함수, 의존성 배열);
- 의존성 배열이 []일 경우 mount, unmount 시 단 한 번씩만 실행됨
- 의존성 배열을 생략하면 컴포넌트가 업데이트 될 때마다 호출 됨


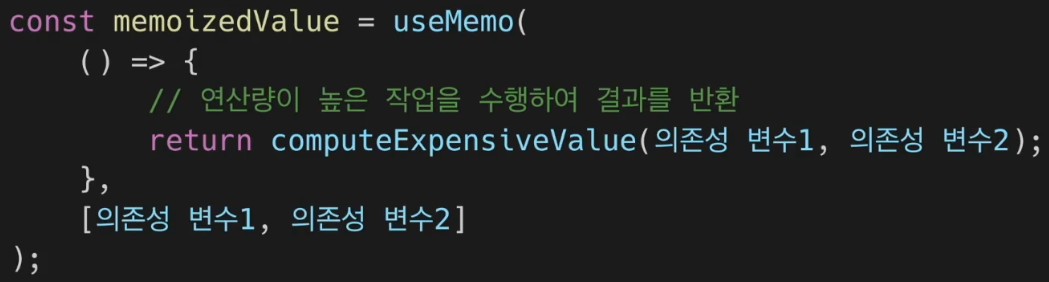
useMemo() : Memoized value를 리턴하는 Hook
- Memoization : 최적화를 위해, 비용이 높은, 연산량이 많은 함수의 호출 결과를 저장해놓았다가, 나중에 필요할 때 반환
- 의존성 배열을 넣지 않을 경우, 매 렌더링마다 함수가 실행 됨
- 의존성 배열이 빈 배열일 경우, 컴포넌트 마운트 시에만 호출 됨
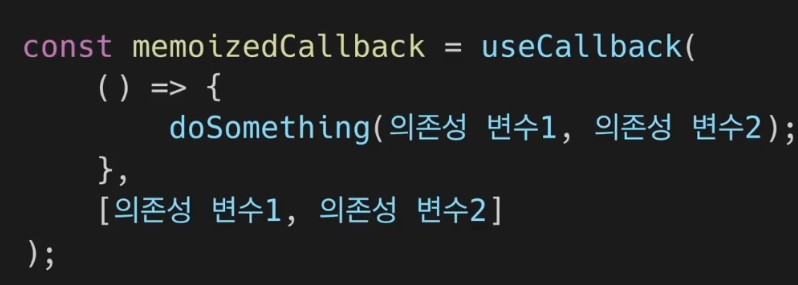
useCallback() : useMemo() Hook과 유사하지만 값이 아닌 함수를 반환
- useCallback(함수, 의존성 배열);
- useMemo(() => 함수, 의존성 배열);
- 위 두줄의 코드는 동일한 역할을 한다.
useRef() : Reference를 사용하기 위한 Hook
- Reference : 특정 컴포넌트에 접근할 수 있는 객체
- refObject.current : current는 현재 참조하고 있는 Element
- const refContainer = useRef(초깃값);
- 변경가능한 current
- 내부의 데이터가 변경되었을 때 별도로 알리지 않는다.
- Callback ref는 내부의 데이터가 변경 시, 알림을 받을 수 있음

Hook의 규칙
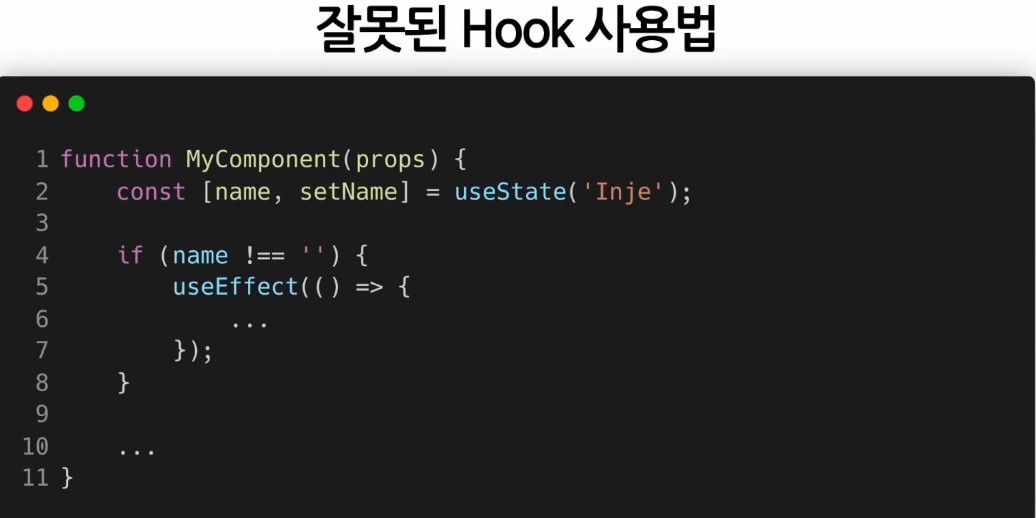
- 무조건 최상위 레벨에서만 호출해야 한다.
- 컴포넌트가 렌더링될 때마다 매번 같은 순서로 호출되어야 한다.
- 리액트 함수 컴포넌트에서만 Hook을 호출해야 한다.
Custom Hook 만들기
- 여러 컴포넌트에서 반복적으로 사용되는 로직을 Hook으로 만들어 재사용하는 방법
- 함수역할을 하지만 엄연히 Hook 이기 때문에 꼭 use로 시작해야 한다!
- 여러개의 컴포넌트에서 하나의 Custom Hook을 사용할 때 컴포넌트 내부에 있는 모든 state와 effects는 전부 분리되어 있다.
- 각 Custom Hook 호출에 대해서 분리된 state를 얻게 됨!
- 각 Custom Hook의 호출 또한 완전히 독립적이다.
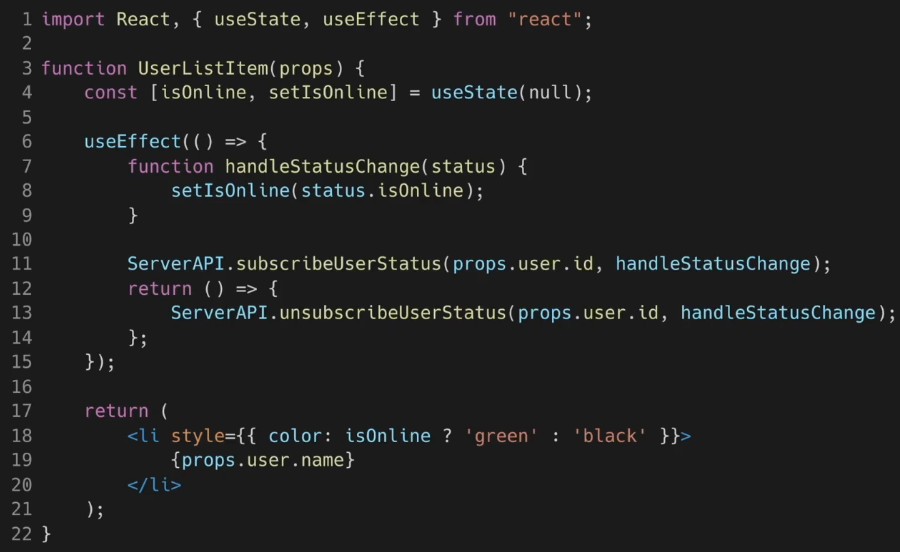
온라인인지 오프라인인지 알려주는 컴포넌트이다. 사용자가 온라인인지 오프라인인지 알려주는 부분을 따로 추출하여, Custom Hook을 만들 예정이다.
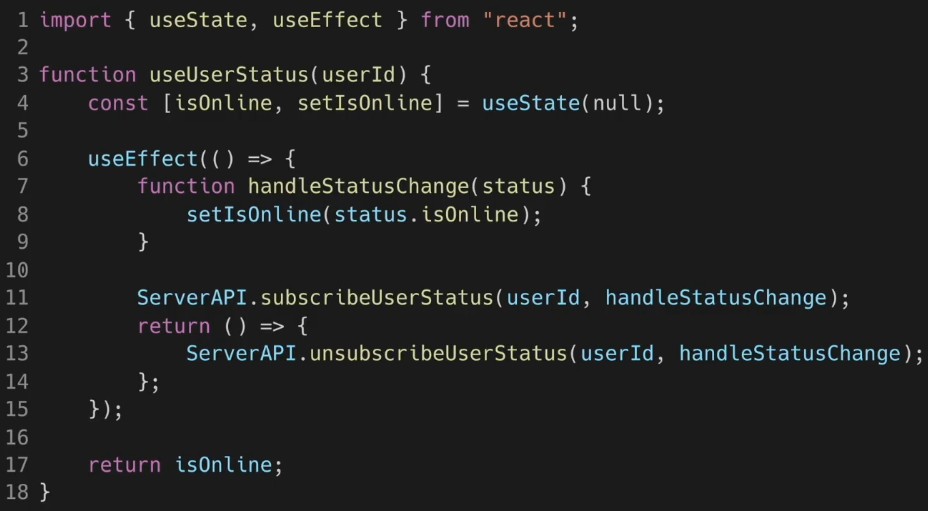
다음과 같이 따로 추출해서 useUserStatus()라는 Custom Hook을 만들었다.
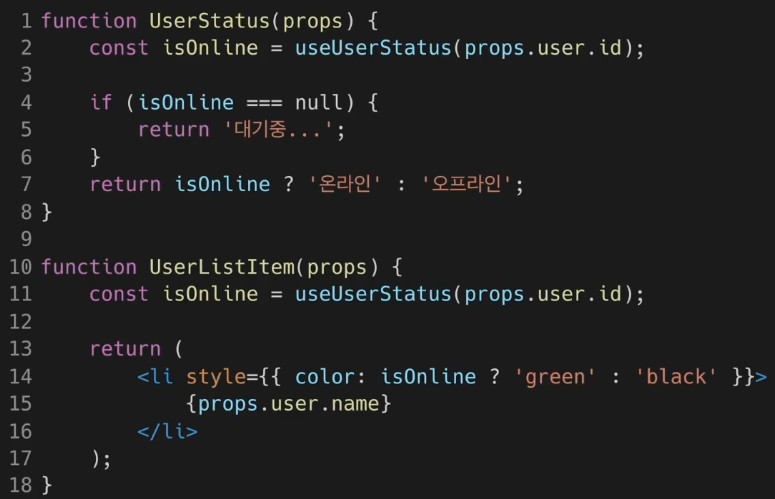
다음과 같이 함수마냥 사용하여 중복되는 부분에 붙여넣기 하면 된다.
비록 함수같은 역할을 하지만 엄연히 Hook이기 때문에 앞에 use로 시작하게끔 이름을 설정해야 한다.
Hook들 사이에서 데이터를 공유하는 방법

'React' 카테고리의 다른 글
| [React] Event (0) | 2024.08.08 |
|---|---|
| [React] Hooks 실습 (0) | 2024.08.07 |
| [React] State and Lifecycle (0) | 2024.08.03 |
| [React] Components 와 Props (0) | 2024.08.01 |
| [React] Rendering Elements (0) | 2024.07.31 |