Context
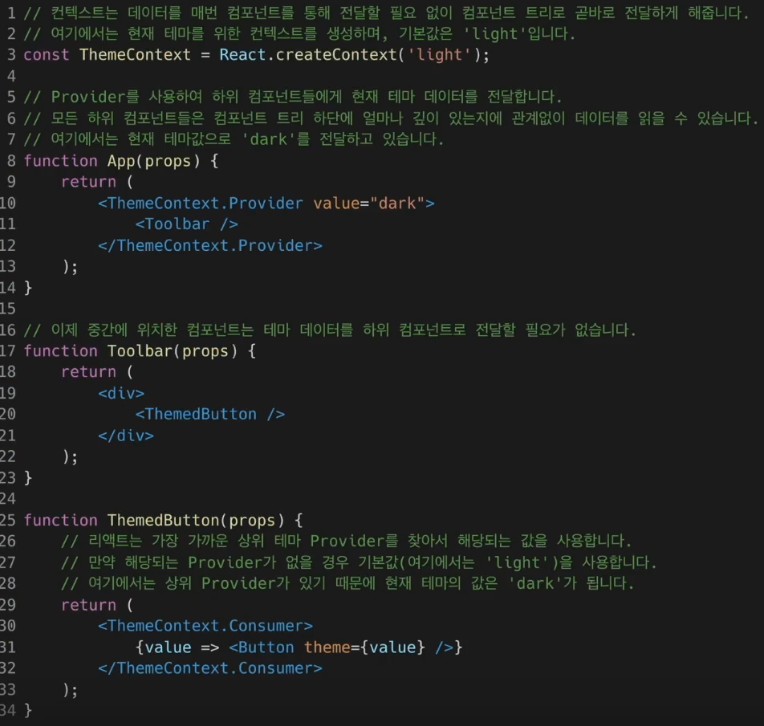
- 기존 컴포넌트의 props를 통한 데이터 전달방식 대신 컴포넌트 트리를 통해 곧바로 컴포넌트로 전달함
언제 Context를 사용해야 할까?
- 여러 개의 컴포넌트들이 접근해야 하는 데이터 : 로그인 여부, 로그인 정보, UI 테마, 현재 언어 등...

이 처럼 props를 통해 데이터 전달하는 방식은 실제 데이터를 필요한 컴포넌트가 깊어질 수록 복잡해진다.
Context를 사용하기 전에 고려할 점
- 무조건 Context를 사용하는 것이 좋은게 아니다. 왜냐하면 컴포넌트와 Context가 연동되면 재사용성이 떨어진다.
- 다른 레벨의 많은 컴포넌트가 데이터를 필요로 하는 경우가 아니라면, 기존 사용방식인 props 를 사용하는게 좋다.
Context API
React.createContext() : context를 생성
const MyContext = React.createContext(기본값);- 만약 상위 레벨에 매칭되는 Provider가 없다면 기본값이 사용 됨!
- 기본값으로 undefined를 넣으면 기본값이 사용되지 않음.
Context.Provider : 제공자라는 뜻, 데이터를 제공해주는 컴포넌트
<MyContext.Provider value={/* some value */}>- value 는 Provider 하위에 있는 컴포넌트들에게 전달된다.
- Provider value에서 주의해야 할 사항

Provider 컴포넌트가 재렌더링될 때마다 모든 하위 consumer 컴포넌트가 재렌더링 됨.

이와 같이 state를 사용하여 불필요한 재렌더링을 막는다.
Class.contextType
- Provider 하위에 있는 클래스 컴포넌트에서 context 데이터에 접근하기 위해 사용함
- 지금은 사용하지 않기 때문에 이런게 있다라는 것만 알아주기

Context.Consumer
- context의 데이터를 구독
<MyContext.Consumer>
	{value => /* 컨텍스트의 값에 따라서 컴포넌트들을 렌더링 */}
</MyContext.Consumer>
function as a child
- 컴포넌트의 자식으로 함수를 사용하는 방법
// children이라는 prop을 직접 선언하는 방식
<Profile children={name => <p>이름: {name}</p>} />

// Profile 컴포넌트로 감싸서 children으로 만드는 방식
<Profile>{name => <p>이름: {name}</p>}</Profile>
Context.displayName
- Context 객체는 displayName이라는 문자열 속성을 가진다.
- 크롬의 React 개발자 도구에서는 Context의 Provider나 Consumer를 표시할 때 이 DisplayName을 함께 표시해준다.
const MyContext = React.createContext(/* some value */);
MyContext.displayName = 'MyDisplayName';

// 개발자 도구에 "MyDisplayName.Provider"로 표시됨
<MyContext.Provider>

// 개발자 도구에 "MyDisplayName.Consumer"로 표시됨
<MyContext.Consumer>
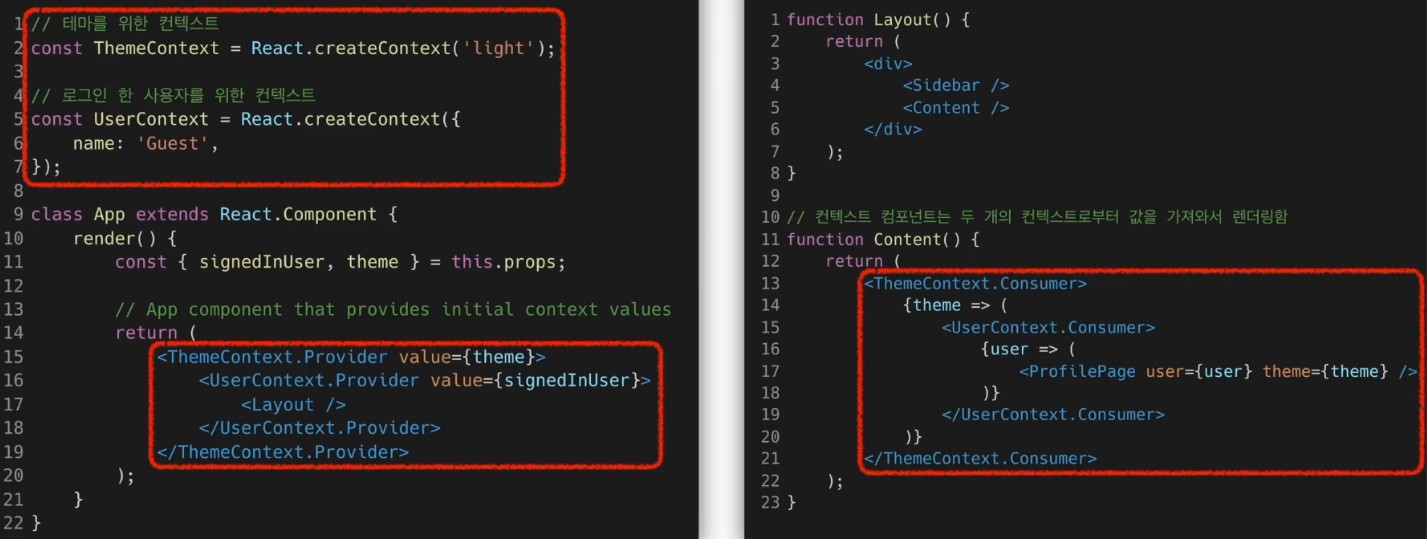
여러개의 Context 사용하기
useContext() Hook
- 함수 컴포넌트에서 Context를 보다 쉽게 사용할 수 있게 함


실습 : Context를 사용하여 테마 변경 기능 만들기
import React from "react";

const ThemeContext = React.createContext();
ThemeContext.displayName = "ThemeContext";

export default ThemeContext;
ThemeContext라는 Context를 만든다. 기본값은 없다.
import { useContext, userContext } from "react";
import ThemeContext from "./ThemeContext";

function MainContent(props) {
    const { theme, toggleTheme } = useContext(ThemeContext);

    return (
        <div
            style={{
                width: "100vw",
                height: "100vh",
                padding: "1.5rem",
                backgroundColor: theme == "light" ? "white" : "black",
                color: theme == "light" ? "black" : "white",
            }}
        >
            <p>안녕하세요, 테마 변경이 가능한 웹사이트 입니다.</p>
            <button onClick={toggleTheme}>테마 변경</button>
        </div>
    );
}

export default MainContent;
MainContent 컴포넌트는 ThemeContext로 부터 데이터를 가져와 해당 테마대로 렌더링을 하는 역할을 한다.
또한 테마 변경 버튼을 누를 경우 ThemeContext로 부터 받은 toggleTheme 함수를 호출하여 ThemeContext의 값을 변경하는 역할을 한다.
import { useState, useCallback } from "react";
import ThemeContext from "./ThemeContext";
import MainContent from "./MainContent";

function DarkOrLight(props) {
    const [theme, setTheme] = useState("light");

    const toggleTheme = useCallback(() => {
        if (theme == "light") {
            setTheme("dark");
        } else if (theme == "dark") {
            setTheme("light");
        }
    }, [theme]);

    return (
        <ThemeContext.Provider value={{ theme, toggleTheme }}>
            <MainContent />
        </ThemeContext.Provider>
    );
}

export default DarkOrLight;
DarkOrLight 컴포넌트에서 다음과 같이 작성한다.
Provider로 하위 컴포넌트에서 theme과 toggleTheme을 사용 가능하도록 만든다.
import React from 'react';
import ReactDOM from 'react-dom';
import './index.css';
import App from './App';
import reportWebVitals from './reportWebVitals';

import DarkOrLight from './chapter_14/DarkOrLight';

ReactDOM.render(
  <React.StrictMode>
  <DarkOrLight />
  </React.StrictMode>,
  document.getElementById('root')
);

// If you want to start measuring performance in your app, pass a function
// to log results (for example: reportWebVitals(console.log))
// or send to an analytics endpoint. Learn more: https://bit.ly/CRA-vitals
reportWebVitals();

실행 결과, 테마 변경 버튼을 누르면 테마가 변경되는 것을 확인할 수 있다.
'React' 카테고리의 다른 글
| [React] react-router-dom v6 (0) | 2024.08.30 |
|---|---|
| [React] styled-component (0) | 2024.08.23 |
| [React] Composition 방법과 Inheritance (0) | 2024.08.20 |
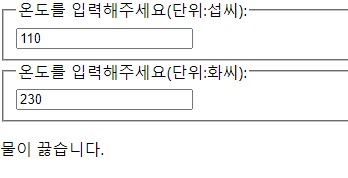
| [React] 실습 : 섭씨온도, 화씨온도 표시하기 (0) | 2024.08.19 |
| [React] Lifting State Up (0) | 2024.08.19 |